- 03 9428 4999


The silly season is on it’s way!
It’s the perfect opportunity to get out of the office (for those lucky ones) and spend some time with family and friends.
But please ensure there’s a proper and up-to-date back up sorted first.
There are a few methods, some more suitable for different situations than others, but it’s definitely a good thing to have something in place. The more data you have, the more difficult and expensive it can be to be backed up as the software and hardware used becomes more complex.
First thing: a backed up file is a file that lives in more than one location. This may be an external hard drive, tape storage or a cloud solution (bear in mind that internet based storage can take a long time to restore from – not to mention the cost of downloading and uploading the data).
Here are some different ways to back up your data:
The Basics: The first port of call for back up on a Mac is Apple’s own Time Machine.
 It’s a set and forget method of backing up most of the important stuff to an external HDD. These days you can set it to back up more than one drive to more than one external drive and it will alert you when you’re low on space, clean outs occurred or it haven’t backed up in x amount of days.
It is only for one computer unless you use Time Capsule (see below) and you’ll want to make sure you have a quality external Hard Disk Drive with enough space to grab everything plus some.
Read this knowledge article for more information on how to set Time Machine up.
Time Capsule
Time Capsule is Apple’s WIFI base station that contains a Hard Disk Drive and acts as a Time Machine location for the whole family. They require only a little setting up and can add some range and power to your WIFI set up easily too. They’re a great product for offering peace of mind to the household.
Larger backup, or business solutions.
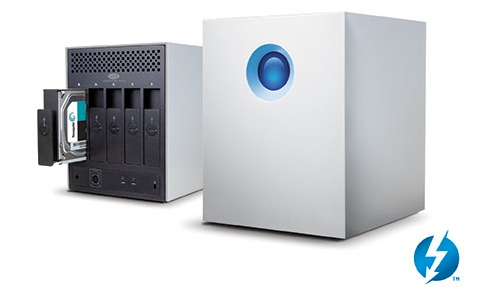
Creative projects can take a great deal of storage and as such can be tricky with regard to backing up. Whether it’s a team of 2 of 30, a regular back up is key to retaining data and so typically a software solution is deployed to offer a schedule with rotating drives and offsite back ups for ultimate redundancy.
Additionally you may not want all your data forever, but usually, there’s a great deal of data that needs to be retained past the day it was finished. Typically this data is moved from the main store to an Archive drive which in itself needs it’s own redundancy. Often multi-disc arrays are the best way to go offering redundancy in the event of a failing drive for what ever purpose it was destined for.
Mac Aid have been helping others sort their backup for a long time, and are happy to help with the right equipment, set up and even monitor it all moving forward.
If you have any questions or would like to book us in to come and setup your backup, then don’t hesitate to get in touch.
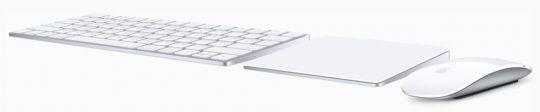
Apple has released their new iMacs, offering new 21.5” and 27” models.
In addition to the 5K retina machine that is available in a 27” model, Apple has now released it’s little brother.
The 21.5” 4K retina display is now available and comes with Apple’s new range of accessories, as well as Apple’s latest operating system, El Capitan.

To accompany the new range of iMacs, Apple has revealed a set of new accessories including the Magic Mouse 2, Magic Trackpad 2 and new Bluetooth keyboard. The accessories have been redesigned in order to have a lower profile, making them more comfortable to use. You will also no longer require AA batteries, as these new accessories will now be rechargeable using a Lightning to USB cable.
The Magic Trackpad 2 will debut Force Touch allowing for a deeper click (like on the iPhone 6s) and have a larger click surface.
If you are interested in ordering any of these products or would like to know more, then get in touch with us.
Apple is well known for their user-friendly software, but sometimes it’s too easy for kids to rack up charges for apps and in-app purchases.
Here are a few things you can try to avoid unwanted and excessive itunes charges to your credit card.
Before you begin make sure to choose a strong Apple ID password
Choose something that won’t be too easy for your kids to guess. Keep in mind that Apple gives a 15-minute window where you can purchase apps without re-entering your password, so keep this in mind when you return a device into your child’s hands.
Option 1: Completely disable purchases
Go to Settings > General > Restrictions. You will need to set up a passcode, so again make sure this is something hard to guess.
In Restrictions, you have the option to disable certain features. Here you can choose to disable In-app purchases or even completely disable the App Store or iTunes Store.
Option 2: Set up an iTunes Allowance
If you don’t want to completely prevent your child from downloading content but want to control their spending, there is also the option to set up a monthly iTunes Allowance. This means your child will only be able to use the allowance you select and not add extra charges to your credit card.
The first thing you’ll need to do is open up iTunes on your Mac or PC, then click on “Buy iTunes Gifts.”

On the next page click on “Learn More About Gifting”

You will then need to scroll down to the bottom of the subsequent page and select “Set up Allowance”.
Here you can choose your child’s monthly allowance. If they already have an Apple ID you can enter it here or otherwise create a new one for them. Make sure to select “None” for the payment method of your child’s Apple ID to stop extra expenses ending up on your credit card.
Another benefit of allowances is that if there are any unused funds left over at the end of a month, they will roll over to the next month.
Even if you want to give your child the freedom to purchase their own content you still have the option to set the rating of TV shows, movies and games. For music, you can choose to allow to disable Explicit content. Just head to Settings > General > Restrictions.
For those of you that visited us during the last couple of weeks, you may have noticed that our office looked a little like this:

Well, we can safely say that the office no longer looks grey and dirty and dusty anymore.
Our new reception is now bigger, brighter and redder than ever!
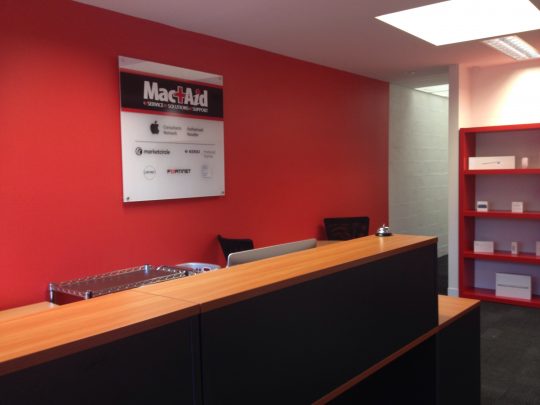 Whilst we have a few little bits to sort out, we think it’s looking pretty good.
Thank you for your patience while we sorted through the mess over the last few weeks.