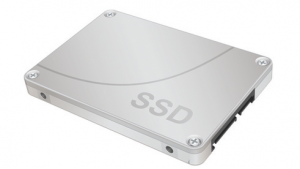
All of this information gets stored on your computer’s hard drive and just like us, if they don’t get a break, checkup and clean out every now and again they have a greater chance of breaking down.
So what steps can you take to improve your hard drive’s health and to make sure it’s not having a hard life?
Is your desktop a mess? Are there documents living on the first level of your hard drive?
Maybe you’re the kind of person who continually searches for that matching missing sock. If you are, your hard drive shouldn’t share your fate.
Minimise the clutter on your desktop by filing away your documents, music and movies into the folders in your user directory. In addition to being nice and tidy, these folders are also, by default, locked away from other local or network users. You should also cleanup the first level on your hard drive. Typically there should be about four items there, System, Library, Applications and Users.
Can you remember what is still tucked away in your downloads folder? Do you happen to have multiple copies of .dmg, .pkg or other installers laying around? Once you’ve installed that piece of software or dragged the contents of that .dmg file to the application folder, there is often very little need to hold onto these delivery systems.This is also a good time to clear out any old movies, documents or files you no longer use.
If you have an archive hard drive with it’s own backup, or another archive system in place, then now is the time to utilise it.
A good rule of thumb is to keep at least 10% – 20% of your total drive capacity empty for caching and other system processes.
Like your regular doctor visits (just to make sure all your limbs are still attached), your hard drive needs regular checks too. Without them, the life of your hard drive may not be as long and prosperous as you once hoped.
Check for i/o errors in Console (Found in Applications -> Utilities)
Console keeps track of all your computers log files. Select “All Messages” in the Log List on the left hand side.
In the search field in the top right corner of the window enter “i/o” (without quotation marks). If the main window appears empty your hard drive is in the clear.
If not, it would be a good idea to make a backup of your machine, and get someone to have a look at it.
Disk Utility (Found in Applications -> Utilities)
The next tool in the utility folder to look at is Disk Utility. Open it up, select your hard drive from the left hand side (Probably labeled “Macintosh HD).
Select ‘First Aid’ then click the “Verify Disk” button.
Disk Utility will check the drive and will notify you of any errors.
If any errors are flagged with either of these tests, it’s a good idea to get a technician to have a look. They will be able to ensure that your data is backed up properly before moving to repair options.
As always, ensure you have a good, solid backup method in place. Recovering data from a backup is always preferable than attempting a recovery from a failing or failed drive. It’s a good move to verify your backup drive in Disk Utility every now and again too.
Haven’t got a backup? It’s recommended you start a backup routine ASAP.
A functional backup system will help in not only a disk failure but can help in case of theft, fire, accidents and sometimes even deletion of files.
Don’t wait until it’s too late. Back up your machine today.
If it’s all too much and you don’t know where to start, don’t worry. Mac Aid are more than happy to help you out. All you need to do is get in touch with one of our friendly staff!
Note: Did you know Mac Aid can offer you a monitoring solution that will track Hard Drive capacity? It notifies us of most major hard drive errors, as well as reporting on RAM, Malware, Network errors and will even keep track of your Time Machine Backups.
This will allow Mac Aid to fix and/or advise on most issues before they present as major problems.
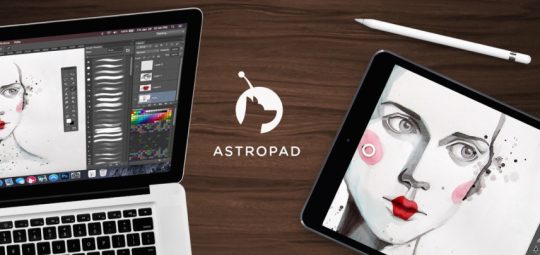
The Apple Pencil has more than exceeded expectations when it comes to pressure sensitivity, varied tilt angles and natural line weights. But for professional artists, the iPad Pro operating system and applications have limited capability.
With the iPad Pro and Pencil, Astropad takes digital sketching to the next level, allowing artists to use their iPad to draw on any Mac application, and unlike other graphics tablets, it is fully wireless. Yes, that includes Photoshop.
Matt Ronge, the co-founder of Astropad, say “iPad Pro is an amazing drawing platform but iOS is far too limited for the professional artist. We wanted a way where we could get the best of both worlds, the power and flexibility of the Mac coupled with the touch interface of the iPad.”
Astropad isn’t a new app, previously allowing artists to draw on their Mac using previous iPad models. But their latest update integrates clean high resolution support for the larger iPad Pro’s screen size and fluid, natural sketching for the Apple Pencil.
The app works by mirroring the screen and allowing full control onto your iPad. Existing technologies, such as Airplay also allowed such functionality however the image quality was poor and the high latency caused frustrating lag. “Neither of which are acceptable for a professional artist,” says Ronge. “So we spent over a year creating our custom tech called Liquid that is both low latency and is very high quality. This is what sets us apart from others that have tried to build something like Astropad.”
Astropad is $30.99 (AUD) and available on the iPhone, iPad and Mac App store.
As the year draws to a close, the team at Mac Aid would like to take the time to thank you for your support throughout the year.
We wish you a Merry Christmas, and a Happy New Year, and hope that you have a safe break.
We would also like to inform you that Mac Aid will be running at a reduced capacity from the 24th of December 2015 through to the 10th of January 2016.
During this period, please call the office and leave a voice mail message, email or use the web form so we can address your issue in due time.
